Hi guys,
If you like to geo-locate your designs, then this tip will save you hours of frustration!
When you import import your site with 3D terrain from Google Earth, it correctly orientates the site. However, if you want your model to be aligned with the global axis, so that you can accurately determine the sun and shading, you may want to consider a workflow option that I use:
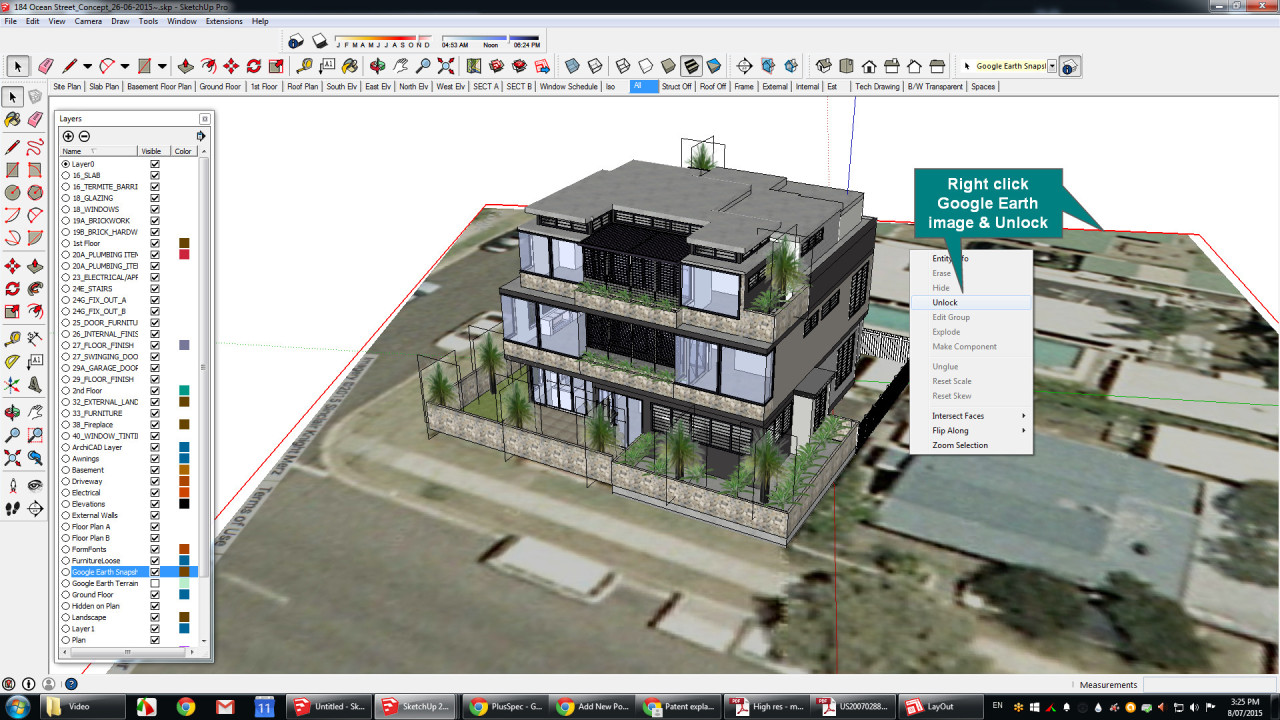
select image right click and unlock
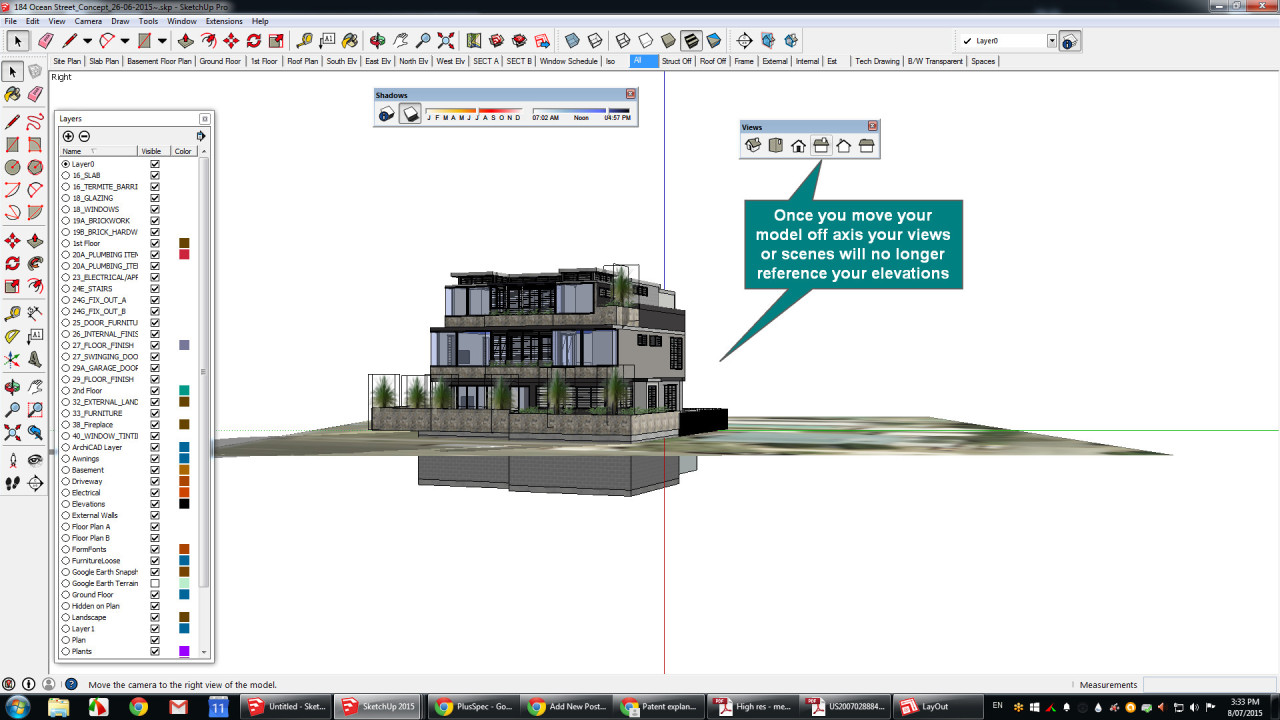
The key is knowing when to move your model, and when not to. You need to also understand when you should change the default axis location, and in what circumstances you should not. Once you move your model off axis your views or scenes will no longer reference your elevations. You can reset your scenes, yet your view icons will not reset.
First you need to ascertain the reason for the model. If the model is for viewing purposes only, always work on axis. If you would like to draw over a Google Earth import, and not use it for solar studies, you should select the Google Earth site (if it is not shown go to layers and and turn on the Google earth snap shot layer), unlock it, and move the site/image to suite the global axis.
It is important to note that your shadows will not be correct at this time. However. you can now draw on axis and create scenes.
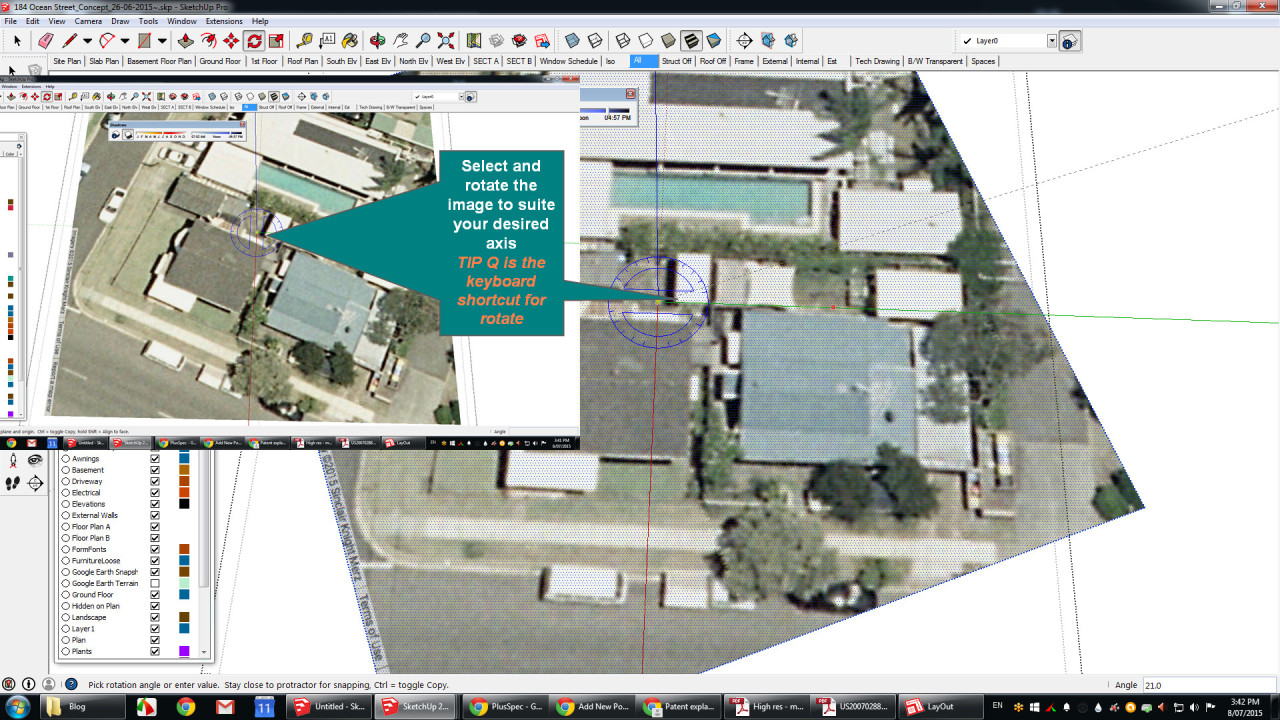
If you intend to use the model for both shadows and drawing, then I recommend that you save the file immediately after you have inserted your Google earth site/image (naming it along the lines of: “shadows”). After it has saved, go to File> save as (naming it along the lines of: “working model”), and then rotate the image as per the screen shot above.
It is important to rotate your image before you start drawing any geometry, as it will allow you to work faster and more accurately. Once you are happy with your model select the entire model that you wish to use, and copy the geometry.
TIP: CTRL A will select all and CTRL C will copy all.
Go to the previous file that you named “Shadows” and open the file. Paste your model into the file, Move and rotate your model to suit the (locked unaltered Google image)
desired location. Your shadows will then be correct.

If you decide to alter your model, ensure that you do it in the ‘working drawing’ version, and then make a new copy, and paste it back into the “Shadow” drawing.
TIP: If you try and draw in the model that is off axis, you will be able to push and pull, yet you will find the model is very difficult to work with when drawing new geometry. Skethcup will try and reference and axis or other geometry on a corresponding axis, and your workflow will grind to an inevitable snails pace.
If you are reading this post, you may have already made this error, and want to know how to go about fixing the issue.
Can it be fixed? The answer is: Yes. However, the question is: Should you fix it?
That depends on the amount of work you did after you changed the axis and continued drawing. If you have some geometry on the global axis and some geometry off-axis, my tip is to delete everything that is off axis and then redraw it. Sorry to be the bearer of bad news, but in this situation it is very difficult to fix.
If anyone else has any other suggestions, we would love to hear from you.
One suggestion is to copy the off-axis geometry and then past it into another model, explode the geometry and rotate it back on-axis and then create a component. It is not a great fix, but it will work.
If this post saves one user from the hassles of working off-axis, then this post has been well worth it! 🙂

Recent Posts
- Residential builders learn to use CAD software for construction
- What to look for when purchasing 3D Software for Residential Construction
- Sketchup Estimating Plugin for Builders
- Importing a Revit Model into Sketchup via IFC & create a report, BOQ or full estimate
- Transforming BIM, with a commitment to continued development & customer focus
Categories
- Architects are from Mars Builders are from Venus Podcast
- Building Products
- Customer Success
- Industry Insights: Design, Construction, Estimating
- News
- PlusSpec/SketchUp Tips & Tricks
- PlusSpec/SketchUp Updates
- Uncategorized